Setup and Settings
Installation
Install the plugin from the Figma Community by clicking Open in… or Open in Dev Mode.
You can find the Tolgee plugin in Figma by clicking the Actions icon in the toolbar (shortcut CTRL + K or ⌘ + K), choosing Plugins & widgets, then searching for Tolgee and clicking Run.
Alternatively, click the Figma button in the top left corner, then select Plugins → Manage Plugins… and search for Tolgee.
First Run
The first time you open the plugin it walks you through three steps. They are named after the three settings tabs, so what you fill in here is exactly what you will find later under Settings.
Projectconnects the plugin to Tolgee and picks your languageStrings & Keysdecides how keys get named and which texts are skippedUpload optionsdecides what travels with your keys when you upload
You can move back and forth with Back and Next, and everything you set here can be changed later in Settings.
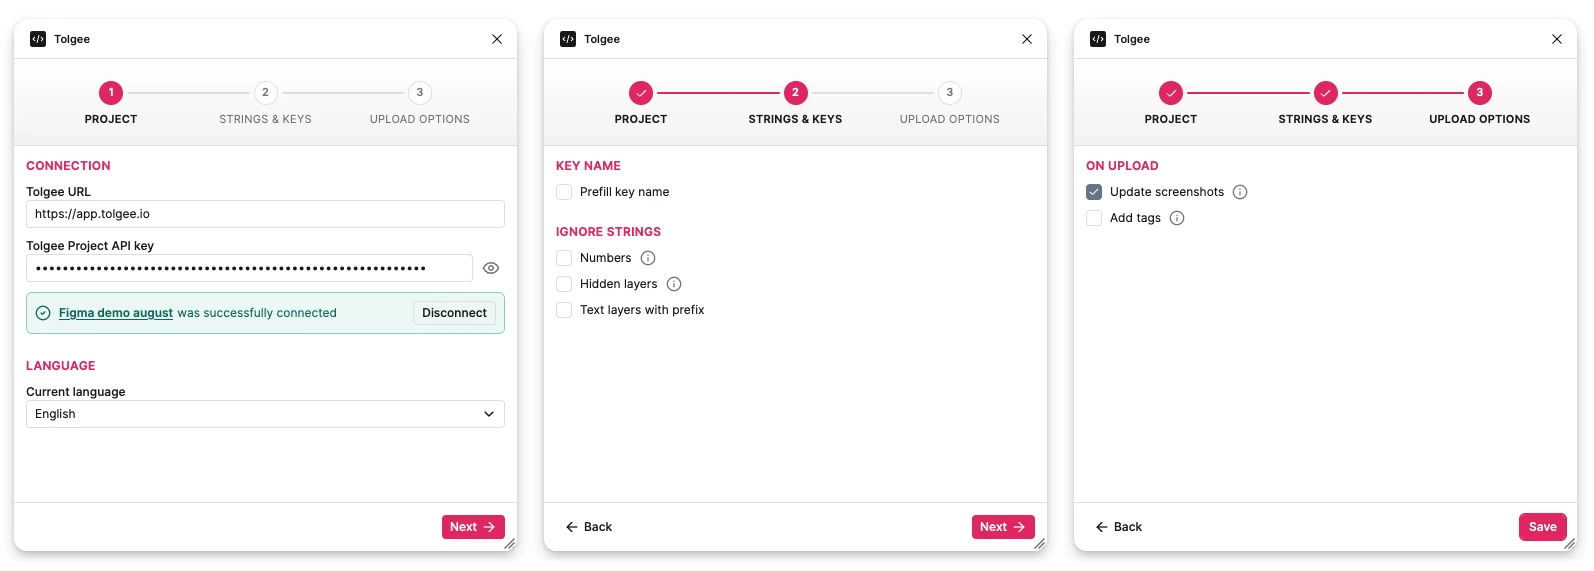
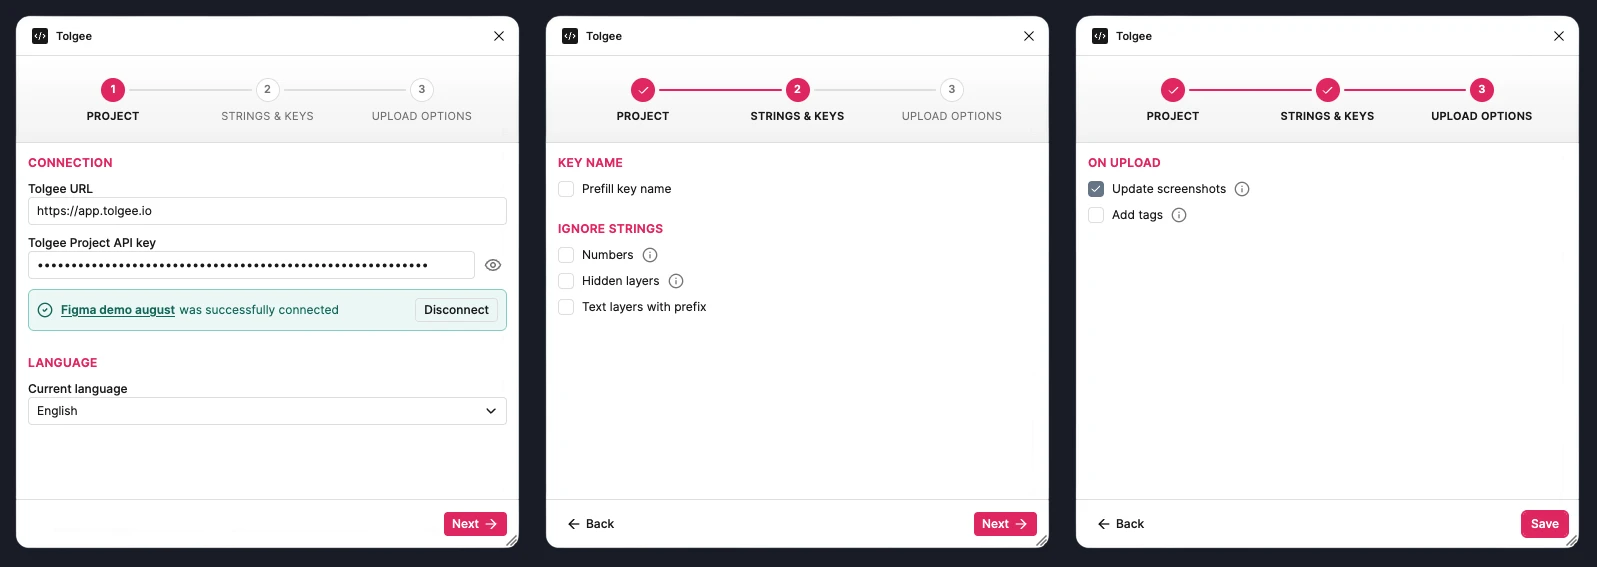
Project
This tab connects the plugin to Tolgee and sets the language your designs are written in.
Connection
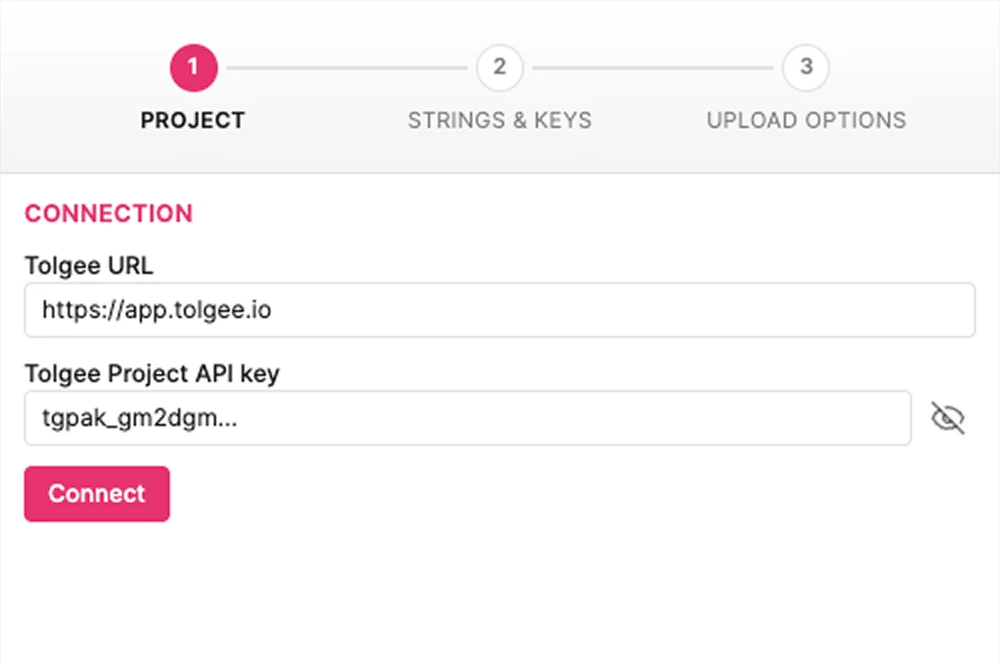
Paste your key into Tolgee Project API key. If you do not have one yet, see how to generate an API key.
Leave Tolgee URL as it is unless you run a self-hosted instance, in which case enter the URL of your own instance.
Once the key is accepted, the plugin shows the name of the connected project. Click it to open that project on the Tolgee platform, which is handy when you want to check something without leaving Figma.
Language
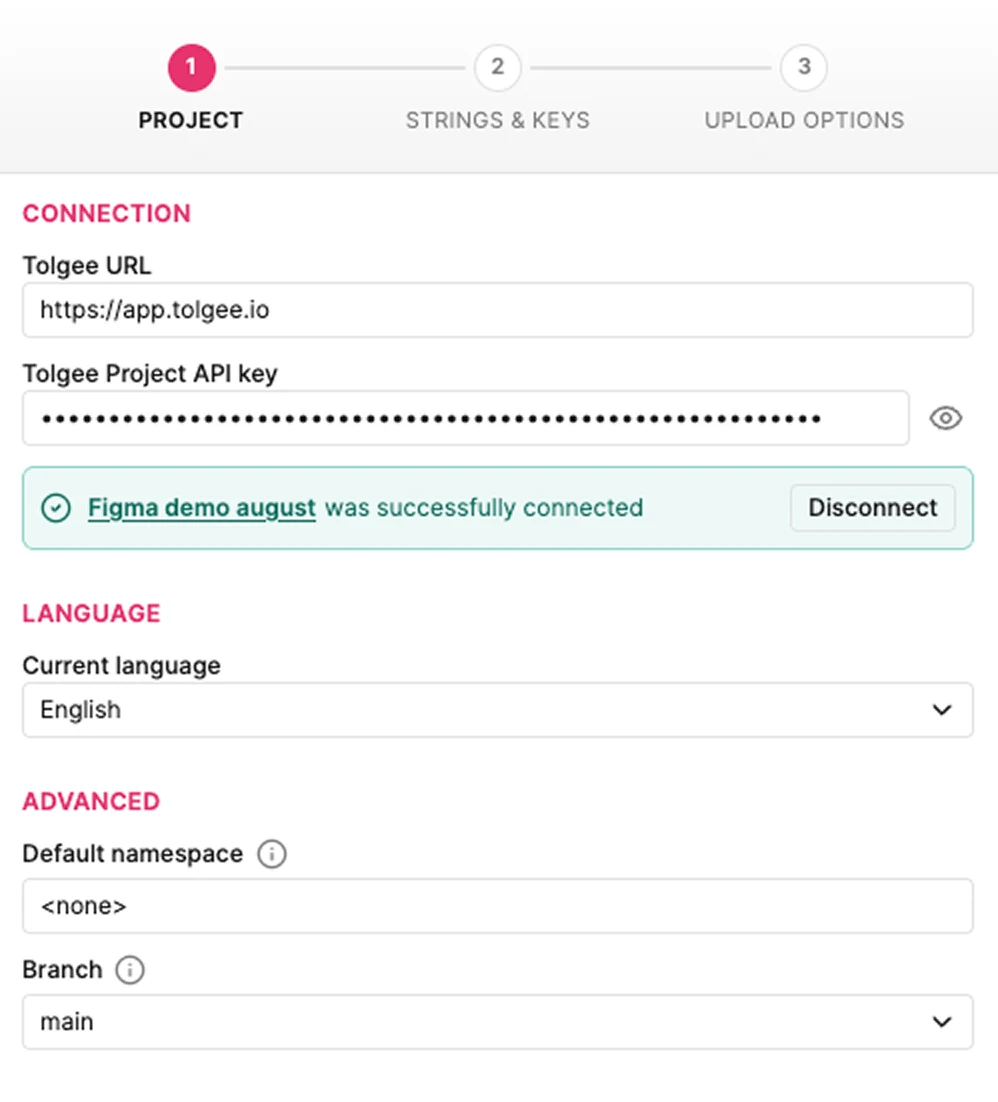
Current language is the language your Figma texts are currently written in. Set it to the same base language your project uses in Tolgee, because everything you upload is treated as a translation in this language.
Changing this selector later downloads that language into the current page, covered in the Usage guide. You can also create a translated copy of the whole page instead, which leaves the original untouched, covered in Page copies.
Advanced
Two settings appear here only when the matching feature is switched on in Tolgee itself. When one is off, the plugin says is disabled for this project instead of showing the field, so you always know whether it is missing or simply not available.
Default namespace is applied to keys you newly create. It does not touch keys that already exist: a connected key's namespace is set in Tolgee, so moving one means disconnecting the string first. See namespaces for what they are.
Branch sets which branch your uploads and downloads target, defaulting to the main branch. A branch selector also appears in the plugin header, so you can switch without opening settings.
Strings and Keys
Key Name
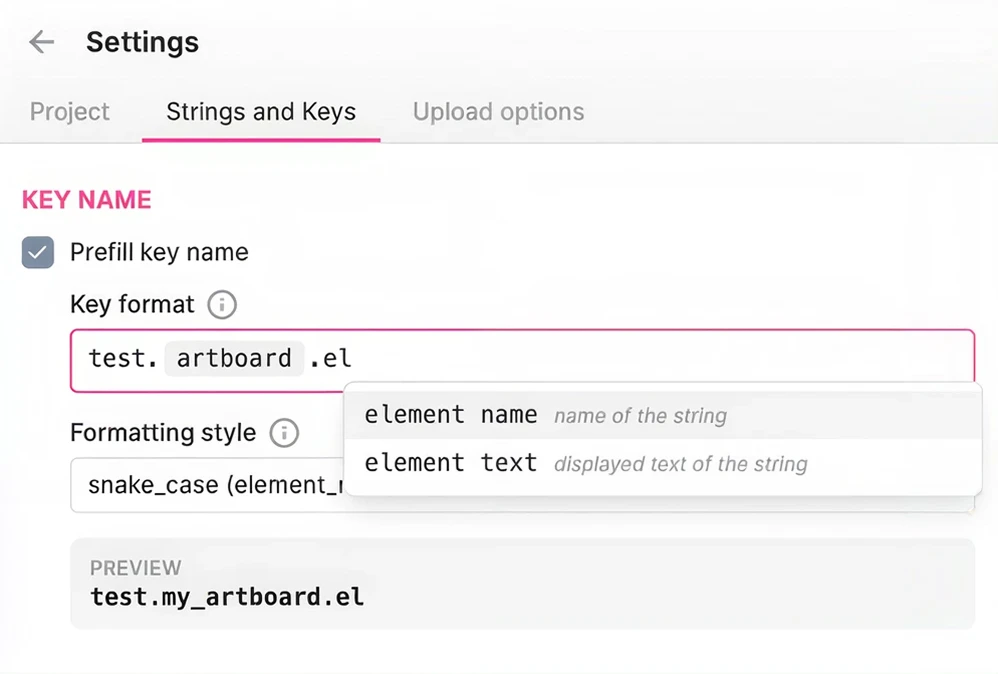
Naming keys by hand is slow, and a team doing it by hand ends up with three different conventions in the same project. Turn on Prefill key name and the plugin proposes a name for every new string, built from where that text sits in your design.
Key format is the template. You build it from variables, your own text, and separators such as . or :. Click the field to pick from the available variables.
| Variable | What it inserts |
|---|---|
{elementName} | Name of the text layer |
{elementText} | The text itself |
{group} | Name of the nearest group |
{component} | Name of the nearest component |
{instance} | Name of the nearest component instance |
{frame} | Name of the nearest frame |
{artboard} | Name of the artboard frame |
{section} | Name of the nearest section |
A format like {artboard}.{elementName} turns a layer called Submit inside a Checkout artboard into checkout.submit.
Not every text has every variable. A layer that sits outside any component has nothing to put in {component}, and in that case the plugin drops the variable together with the separator next to it, so you never end up with a stray dot in the middle of a key.
Formatting style keeps the casing consistent no matter how the layers were named. It is applied to the variables automatically.
keep original formatsnake_case (element_name)Snake_case (Element_name)camelCase (elementName)PascalCase (ElementName)noSpaces (elementname)
A preview at the bottom shows the result as you build the format, so you can see the shape of your keys before committing to it.
A generated name is only ever a starting point. You can edit any key by hand, generate names for part of a screen and fill in the rest yourself, or change them later with bulk operations.
Ignore Strings
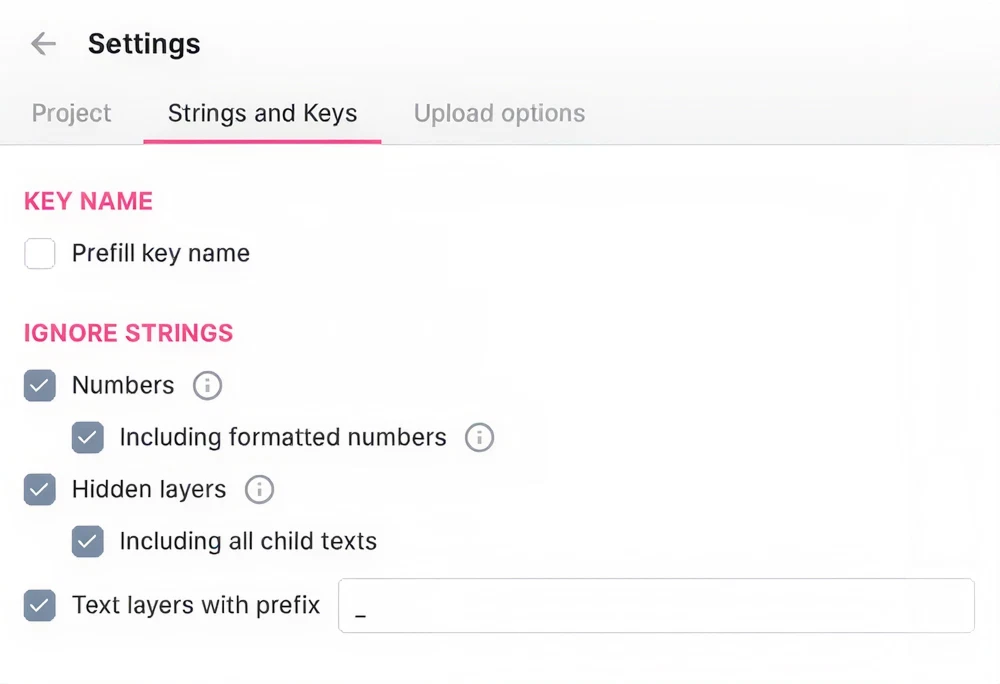
Not every text layer is a translatable string. Prices, spacing labels, placeholder numbers and scratch notes all clutter the list and slow you down. These settings keep them out of the plugin so what you see is what you actually want to translate.
Numbersskips strings made only of digits, such as100or42. Turn onIncluding formatted numbersto also skip values like1,234.00Hidden layersskips layers whose visibility is turned off in Figma. By default only the hidden layer itself is ignored, so turn onIncluding all child textsto skip everything inside a hidden frame tooText layers with prefixskips layers whose name starts with the prefix you set inIgnore prefix. It is prefilled with an underscore, and you can change it to anything. This lets you mark scratch content in the layer list itself
Ignored texts stay in your design exactly as they are. They simply stop appearing in the plugin.
Upload Options
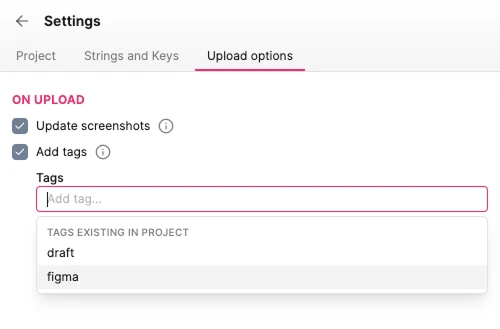
This tab decides what travels alongside your keys when you upload them to Tolgee.
Update screenshots is on by default. Screenshots are what let a translator see where a string actually appears, which is often the difference between a correct translation and a plausible one.
Add tags attaches tags to every key you upload. Choose from existing tags or type a new one and press Enter. Tagging everything that comes from Figma is a common way to find design-originated keys on the platform later.
Tags travel one way only. A tag someone adds on the Tolgee platform does not appear back here.
Setting Up a Page
Settings apply to the whole file, but each page also needs to declare which language its text is written in. The first time you open the plugin on a new page, it asks with a short Set up this page screen.
Pick the language and click Confirm. You can change it later from the plugin header.
What Next
With the plugin connected, the Usage guide covers the everyday work of connecting texts to keys, uploading them, and bringing translations back into your designs.